| Edge detection with a sub-pixel precision |
|
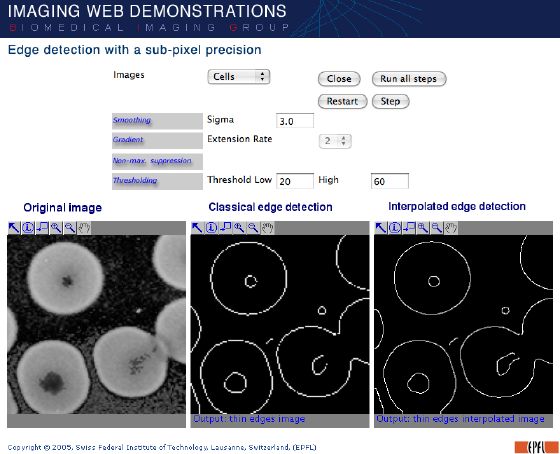
Description
This demonstration compares the performances between a classical Canny edge detector and one based on an interpolation algorithm. By interpolating
the image, we are able to compute directly the gradient without numerical approximated operator. We also can extend the size of the image, to increase
the visibility of little details. The interpolation is performed with cubic splines, which have the advantage to have a finite impulse response,
wich makes the implementation very convenient and efficient.
The cubic spline interpolation provides a good reconstruction, and, with a recursive implementation made in the spatial domain, we can have a
relative fastness of response. So, by this method, we are able to obtain a really higher degree of precision with an acceptable time of
computation.
Note: Even the parts of the algorithms which are identical for both detectors were differently implemented. This implies that some of the differences
can be only due to those programming differences.
|
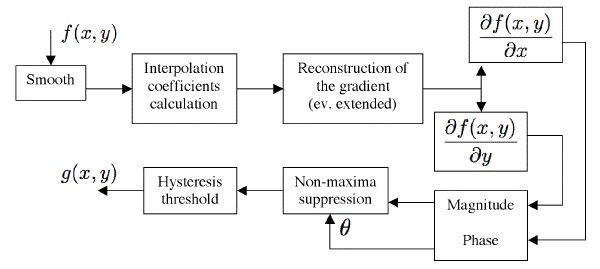
| Block scheme of the algorithm |
|
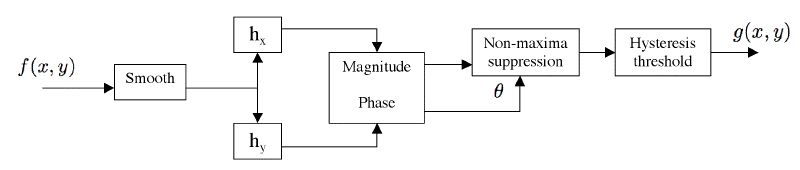
The two block schemes below show the differences between our algorithm and a classical Canny edge detector. We can see that the two block schemes are different
only by the interpolation and the gradient stage. This shows that a good part of the original algorithm can be maintained, and that the changes to improve the
quality of the edge detection aren't too important.
|
Block scheme of the interpolating edge detector |
 |
| Block scheme of the classical edge detector |
 |
|