| Biomedical Imaging Group |
| CONTENTS | ||||||||
|---|---|---|---|---|---|---|---|---|
| Home Page | ||||||||
| News & Events | ||||||||
| Members | ||||||||
| Publications | ||||||||
| Tutorials and Reviews | ||||||||
| Research | ||||||||
| Demos | ||||||||
| Download Algorithms | ||||||||
| Ovuscule | ||||||||
|

| DOWNLOAD |
|---|
| UNIX distribution |
| Macintosh distribution |
| PC distribution |
Ovuscule
An ImageJ plugin that implements an ovuscule.
Philippe Thévenaz, Biomedical Imaging Group, Swiss Federal Institute of Technology Lausanne
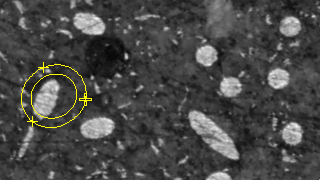
Figure 1. Ovuscule before convergence.
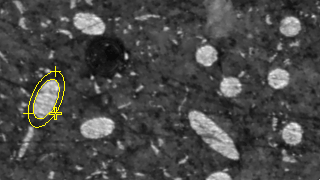
Figure 2. Ovuscule after convergence.
General Description
The snake of this plugin is of the image-processing variety, also known as active contour. Its purpose is to detect elliptical blobs in images and to quantify them. It also illustrates the behavior of a textbook ovuscule described here.
The plugin allows one to apply and keep record of ovuscules.
I. Download
This distribution is dated July 6, 2011. It includes the source files, along with a jar file that contains the precompiled classes. There is also a Java package for which an api is also made available.
- UNIX distribution [358,400 bytes]
- Macintosh distribution [110,511 bytes]
- PC distribution [113,723 bytes]
II. Related Work
This set of Java classes is based on the following paper:
P. Thévenaz, R. Delgado-Gonzalo, M. Unser, "The Ovuscule," IEEE Transactions on Pattern Analysis and Machine Intelligence, vol. 33, no. 2, pp. 382-393, February 2011. Other relevant on-line publications are available at http://bigwww.epfl.ch/publications/.
Ovuscule has been written as a plugin for ImageJ. Please read the ImageJ documentation to learn how to install plugins.
III. Technical Explanations
The ovuscule is an active contour (or snake) that takes the shape of an ellipse. The contour is parameterized by three xy-coordinates (six numbers) that define an ellipse (five numbers). The energy functional combines regularization and data term; regularization is used to restore the balance between the number of parameters of the curve description (six) and the number of parameters of an ellipse (five), while the data term favors bright blobs surrounded by dark background. Altogether, the ovuscule behaves like a detector of elliptical bright blobs.
We distribute the source code that handles the mathematical wizardry of our ovuscule. The part of the code that handles more mundane tasks such as the front-end is encapsulated in a Java package for which we distribute the archive and the documentation.
IV. User Manual
Launch
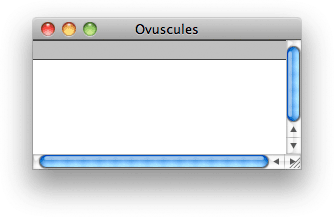
Figure 3. Empty table of results.
The plugin requests at least one open image at launch. All image types are accepted, but the processing will be performed on the luminance channel in the case of RGB Color images. In the case of a RGB Stack or a HSB Stack, the processing will be performed on the current channel instead. In the case of 8-bit Color images, the underlying color indices will be treated as intensity value.
At launch, a results window will appear (see Figure 3). This window is initially empty and previous results are overwritten—they may have resulted from operating the Analyze menu, or from previous Ovuscule sessions. The ovuscule can then be operated upon thanks to a revised set of tools from ImageJ's toolbar, which we discuss below. ImageJ's toolbar is restored as soon as the ovuscule dies.
Image magnification/minification
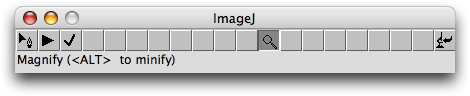
Figure 4. Zooming tool.
To magnify an image, select the magnification tool and click in the image. To minify an image, use the same tool with the <CNTL> or <ALT> keyboard modifier.
Moving a point
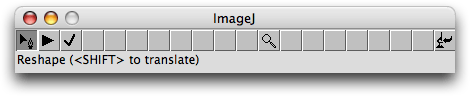
Figure 5. Tool to move points.
To select a point, click anywhere in the image. The point closest to where you clicked will be highlighted. To move points, drag within the image. The point closest to where you clicked will be moved to the position where you release the mouse. Alternatively, you can use the keyboard arrow keys to get a finer control over the position of the points; for this to work, the image window must be frontmost. Note: it is not possible to interactively move a point outside of the image frame.
To translate the snake all at once, you can also depress the <SHIFT> key before dragging the mouse. Still, a combination of shift and arrow keys will move just one point.
Optimizing the snake
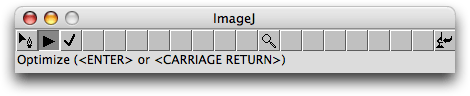
Figure 6. Tool to launch the optimization.
The 'play' button (a right-pointing black triangle) is used to start optimizing the snake. The <ENTER> and <RETURN> keys provide convenient shortcuts for this operation; for this to work, the image window must be frontmost. In this mode and during the optimization, the set of tools is modified as follows:
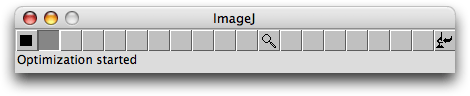
Figure 7. Available tools during snake optimization.
The 'stop' button (a black square) is used to manually abort the optimization. If hit, the resulting snake will be returned in the state where it achieved the most favorable configuration so far during the course of optimization. If left to its own devices, the snake will converge to some (possibly local) optimum.
Recording the snake
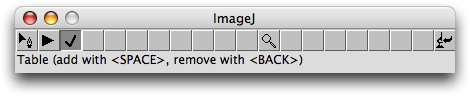
Figure 8. Tool to deal with the table of results.
The 'record' button (a check mark) is used to give access to a panel of buttons that perform various operations on the table of results. The most important operation is that of appending the current state of the ovuscule and is also available through the shortcut of the <SPACE> key; for this to work, the image window must be frontmost. Similarly, it is possible to remove the last entry from the table, either with the appropriate button, or with the <BACKSPACE> key. Emptying the table is achieved thanks to the 'Clear Table' button. Finally, the button 'Graph Table Entries' gives access to the visualization of the work achieved so far. The panel of buttons is shown in Figure 9.
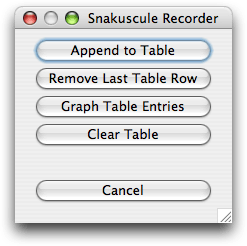
Figure 9. Operations that deal with the table of results.
The 'Graph Table Entries' leads to the panel of buttons shown in Figure 10. These operations become available as soon as at least one ovuscule has been recorded. Only recorded ovuscules play a role; the current one is ignored entirely. When the box 'Include Labels' is checked, recorded ovuscules are displayed with the number that identifies them in the table of results. The operation 'Stamp' modifies the image values, by impressing the ovuscules outlines—possibly with their label. Beware: subsequent ovuscules will be driven by the stamped data, not by the original data anymore.
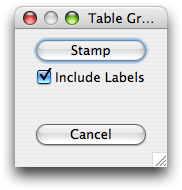
Figure 10. Operations and settings to display and document the ovuscules recorded so far.
Understanding the table of results

Figure 11. Table showing the parameters of ovuscules from Figures 1 and 2.
The location and size of a ovuscule is described by the three points p = (p1, p2), q = (q1, q1), and r = (r1, r1). As described here, this leads to a measure of energy E of the ovuscule. For convenience, the table also gives the length a of the semimajor axis and the length b of the semiminor axis, along with the tilt φ of the ellipse, in degrees. Those are the ten numbers recorded in the table of results, along with a numeric ID to label each ovuscule. The concordance of the table headings with the symbols of the paper is as follows: X0 = p1, Y0 = p2, X1 = q1, Y1 = q2, X2 = r1, Y2 = r2, J = J, a = a, b = b, φ = φ. We see in Figure 11 that the initial configuration of Figure 1 leads to a ovuscule with energy J = -5.029, while the optimal configuration of Figure 2 sees a much lower energy J = -57.153.
Returning to ImageJ
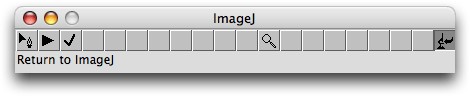
Figure 12. Tool to leave the ovuscule.
This tool is used to gracefully return to ImageJ. The leave tool is available during interaction and optimization as well. The <ESCAPE> key provides a convenient shortcut for this operation; for this to work, the image window must be frontmost.
V. Conditions of Use
© 2011 Philippe Thévenaz
This program is free software: you can redistribute it and/or modify it under the terms of the GNU General Public License as published by the Free Software Foundation, either version 3 of the License, or (at your option) any later version.
This program is distributed in the hope that it will be useful, but WITHOUT ANY WARRANTY; without even the implied warranty of MERCHANTABILITY or FITNESS FOR A PARTICULAR PURPOSE. See the GNU General Public License for more details.
You should have received a copy of the GNU General Public License along with this program. If not, see https://www.gnu.org/licenses/.
You undertake to include a citation or acknowledgment whenever you present or publish results that are based on this program. EPFL makes no warranties of any kind on this software and shall in no event be liable for damages of any kind in connection with the use and exploitation of this technology.